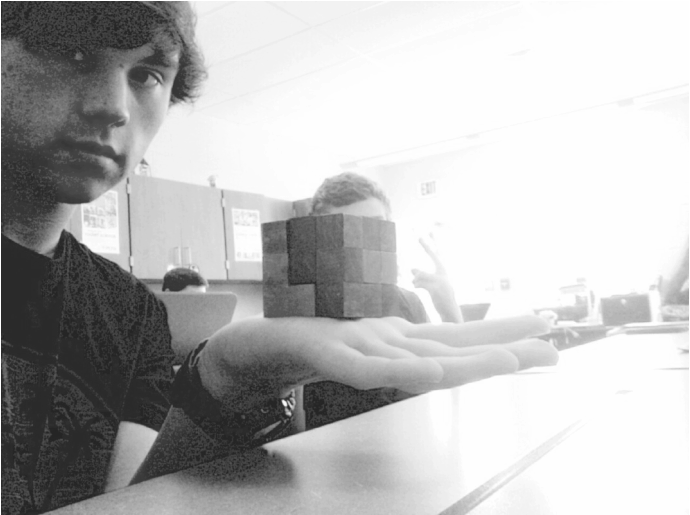
Puzzle Cube Project
Define The Problem
Generate Concepts
|
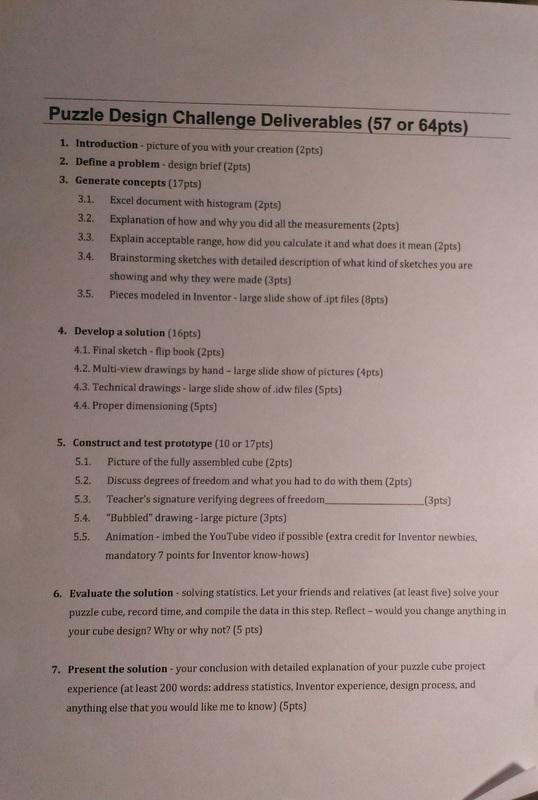
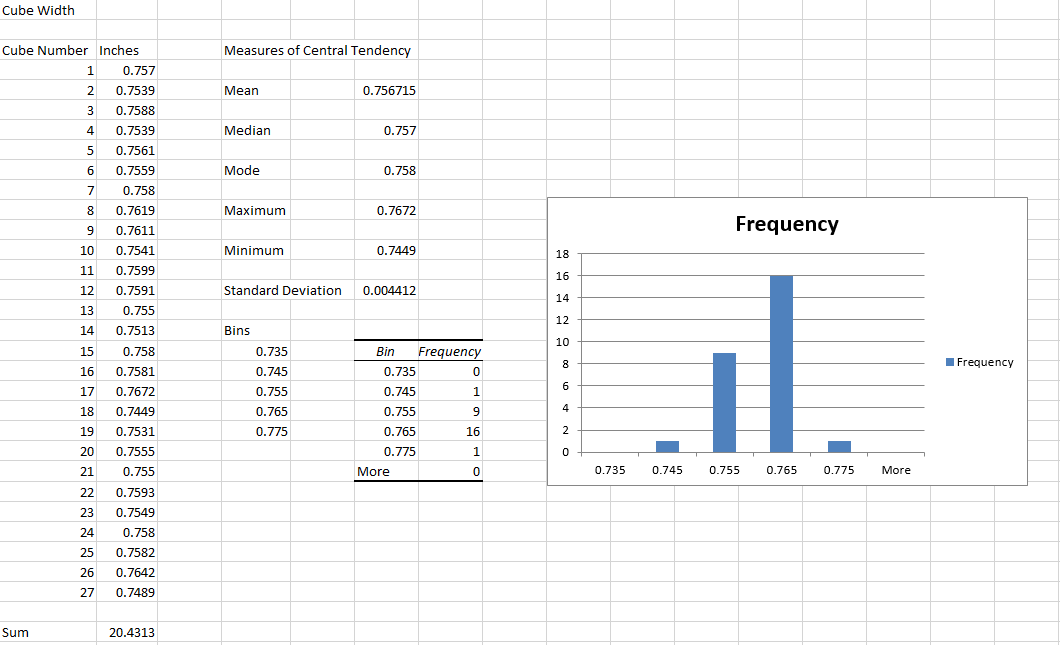
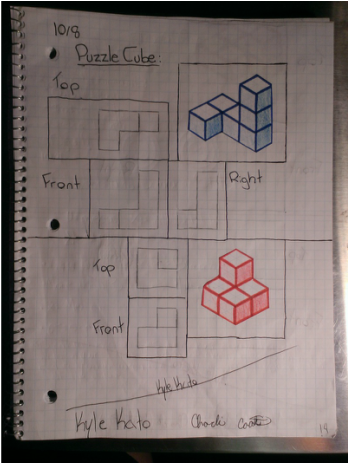
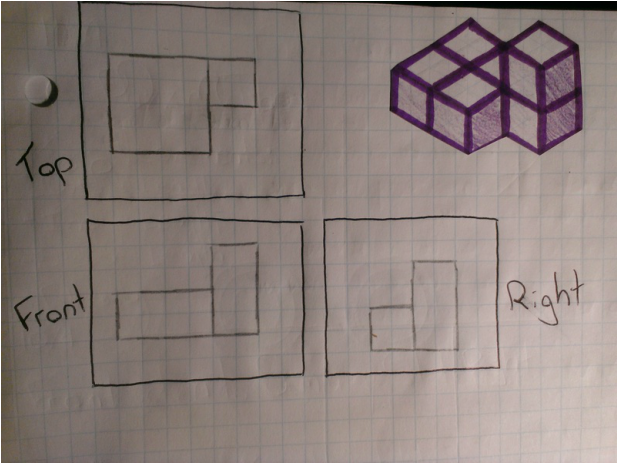
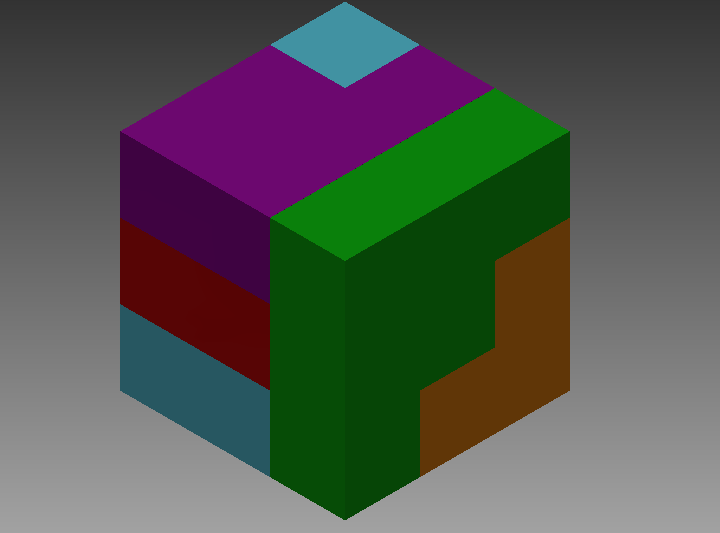
For this step of the Design Process we had to measure 27 wooden cubes with a dial caliper and find the measures of central tendencies using the measurements. After we had collected all the data we created a histogram to show the frequency of the cubes length. Then we had to come up with 20 different combinations on pieces we could possibly use for our Puzzle Cube. The pieces couldn't be any less than 4 pieces and anymore than 6 pieces and the pieces had to be drawn on isometric paper (shown left). After we had our 20 sketches we had to pick out 5 pieces that we would use in our final design and create them using Inventor (shown below).
|
Develop a Solution
|


|
Construct and Test Prototype
|
|
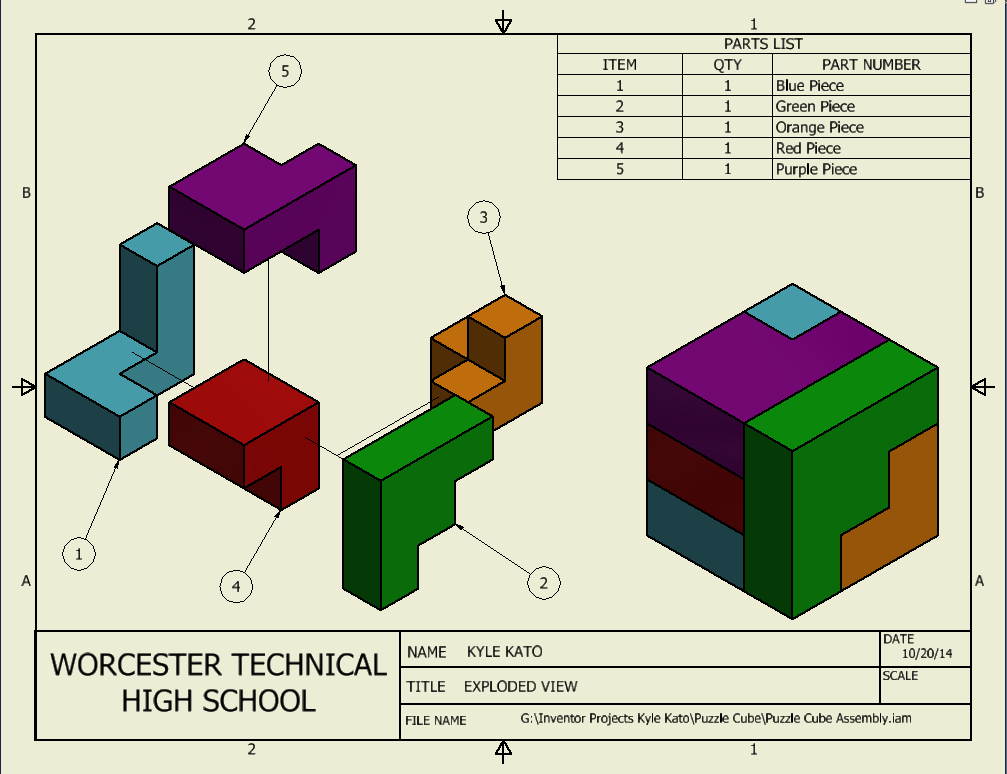
For this step of the design process we had to take all of our Puzzle Cube pieces online and constrain them together the way the Puzzle Cube is supposed to be built (shown top left). During this, we had to check and make sure the cube had no Degrees of Freedom. Degrees of Freedom are the different ways an object can move on the x, y and z axis. After we had completed this we then had to make an animation on how the pieces actually went together and also create a "bubbled" drawing for the Puzzle Cube assembly (top right).
Evaluate the Solution
|
Mom: Gave up after 10 minutes
Dad: 1.07 minutes Charlie Coates: 1.44 minutes Justin Hammond: 2.53 minutes Jacob Sample: Gave up after 10 minutes |
The people shown to the left completed my Puzzle Cube in a range of times. The fastest was my Dad with 1.07 minutes and the slowest was my Mom and Jacob who reached the time limit of 10 minutes. I don't believe the Puzzle Cube was very hard but to some people it took longer than expected. Maybe I could have designed it better and easier since it is supposed to be for younger kids but that is the only thing I would change.
|
Present Solution
During our Puzzle Cube project we had to complete a lot of
things during the time span of 2 weeks. The first thing we did was receive
27 wooden cubes and measure each one using a dial caliper. Then using the measurements
we had to find the measures of central tendency, mean, median, mode, maximum, minimum
and standard deviation. After we completed that we created a histogram showing
the frequency of the cube size. Then we had to come up with 20 different piece
ideas and out of those 20 pick 5 that would work for the cube. Once we had
selected our 5 pieces we then had to sketch all 5 in our engineering notebook and
create them using Inventor. Then using the 5 pieces on Inventor we constrained
them together so we had a fully completed Puzzle Cube on Inventor and created
multi-view sketches using Inventor for all 5 pieces and a “bubbled” view for
the assembly. The final thing we had to complete was to create an animation showing how all
the pieces came together, which we did by creating a presentation on Inventor. We
then uploaded everything onto our Weebly and were done. The Puzzle Cube project wasn't terribly hard but I can see that if you fell behind it would be kind of difficult to catch up without help from the teacher and your classmates. Altogether though the Puzzle Cube project was a fun project to do and it made me more familiar with the types of things you will expect from us in the future.
