Train Project

Define The Problem
For this project we were given a packet of 10 drawn and fully dimensioned train parts and we were given 7 schools days to create all the parts on Inventor, assemble the train, and create dimensioned drawings for every part.
Generate Concepts
After I was given the packet, I started looking through each part and determined which parts would be the easiest to create and which parts would be the hardest to create. I then constructed the easiest parts first and saved the hardest parts for the end. Because some of the parts gave me trouble when I tried to create them I used YouTube tutorials to help show me what I was doing wrong and what I should fix.
Develop a Solution
Below are the train parts and their dimensioned views
Construct/Test a Prototype
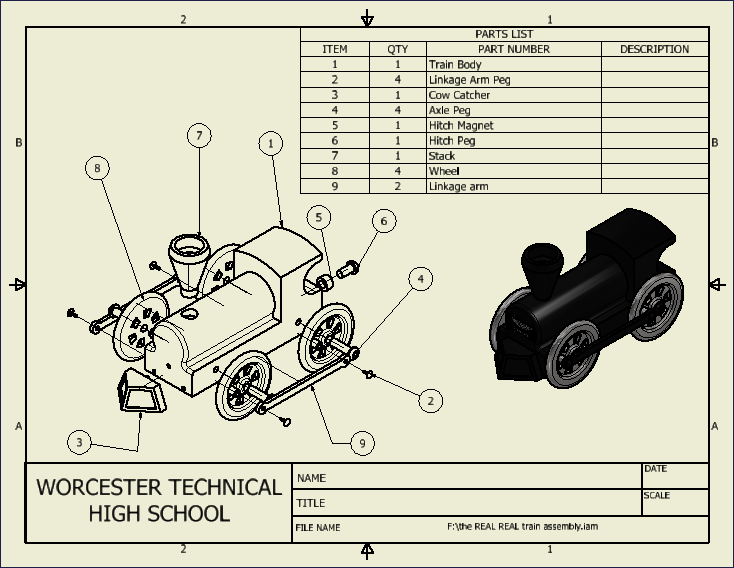
Below are all the train parts modeled on Inventor and the fully assembled train. Also, an exploded drawing of the train is shown below.
Evaluate The Solution
My mom thinks that my train project looks really neat and that the colors look nice together and that I did a very nice job on the project all around. My dad is currently out of town so I can't ask him what he thinks of my train project.
Present the Solution
This train project , I felt, was definitely a challenge because there was a lot to do and not a lot of time. I felt like I could have managed my time better and that way I wouldn't have felt so rushed to get everything completed. I did like the project and I learned some new skills like how to do section views, auxiliary views and broken views on Inventor and how to add hole dimensions and tolerances on different parts. The purpose of section views is to show what the object would look like if a portion of it was cut out. I used a section view when I created the Stack and Wheel drawings on Inventor. For the Stack I used a full section view (half the object) and for the Wheel I used a half section view (a fourth of the object). Auxiliary views help you see what a slanted surface of an object would look like if it was flat. This helps you dimension the angled surfaces easier. When dimensioning holes, symbols are used to indicate the type of hole instead of words because then the drawing would get too cluttered and you wouldn't be able to read other dimensions. Lastly, we use tolerances to tell the engineers that they have a little room for error when constructing the object and that it cannot be over or under a certain length. Tolerances still allow the object to function so without them the engineer could mess up the object during construction and the object wouldn't be able to do the task it was designed to do.
